In this step-by-step tutorial, I will show you how to build websites with WordPress. Building a website is not as difficult as you might think. In fact, it’s never been easier to build a website. Especially now with all the free resources and open source software like WordPress. You don’t actually need to know how to write code.
Although it is very helpful to learn some basic HTML and CSS, you don’t need to dive deep into programming languages unless you plan on being a programmer.
I started creating websites around 1999/2000. Back then, we didn’t have a lot of options so I built a lot of sites from scratch. But don’t get me wrong, I am very happy I have in-depth knowledge of both HTML and CSS as it is very useful for many reasons.
Table of Contents
- Static vs Dynamic Websites
- HTML Websites
- Dynamic Websites
- WordPress
- Let’s Build A WordPress Website
- Domain & Hosting
- Signup For Domain & Hosting In 1 Minute
- Install WordPress
Static vs Dynamic Websites
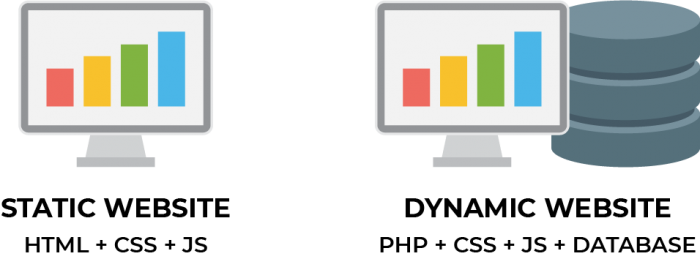
There are basically two types of websites; static and dynamic. Static websites are considered the most basic as they do not store data in a database. They usually consist of HTML, CSS, Javascript, and images.
Dynamic websites on the other hand are written using server-side scripting languages like PHP, ASP, JSP, or Coldfusion along with CSS and Javascript. They also have the ability to communicate back and forth with a server to store and retrieve information.
Content management systems (CMS) and blog software such as WordPress take advantage of languages like PHP and databases to store and retrieve saved information such as usernames, passwords, and other content. There are advantages and disadvantages to both static and dynamic websites. Let’s take a look.
HTML Websites
Static HTML websites are great for small websites that don’t need to be updated frequently as they require someone with working knowledge of HTML such as a web designer or webmaster.
They take longer to update because you need to open up the .html file and edit the code and then upload the changes to the webserver using FTP (file transfer protocol).
The advantages are that the website is way faster because there are fewer files involved and you don’t have to communicate with server-side scripts and databases. Another advantage is they are a lot harder to hack.
| Pros | Cons |
|---|---|
| Great for smaller sites | Harder to update |
| Faster load times | Limited functionality |
| Usually more secure | Can take more development time |
Want to learn the basics of HMTL? Check out this step by step guide to learning HTML the fun and easy way.
Dynamic Websites
You can do a lot more with dynamic websites such as sending data through form submissions and updating your website through a password protected admin area without touching any code.
This is only possible using a very large code base and communicating with a database to store usernames, passwords, pages, posts, etc.
The overall structure and framework for CMS and blog software like WordPress is very complex and usually take a dedicated team of programmers and designers to develop, manage, and maintain.
Lucky for us, WordPress is open source and freely available for anyone to download and further develop themes and plugins for.
WordPress
As I have mentioned, WordPress is open source and free to download and develop your own website. There’s a ton of advantages to using WordPress for websites, blogs, and just about any kind of website you can think of thanks to the huge and ever growing community of plugin developers and theme designers.
We can now build just about any kind of website just by installing a great theme and some plugins to get the functionality and features we really want.
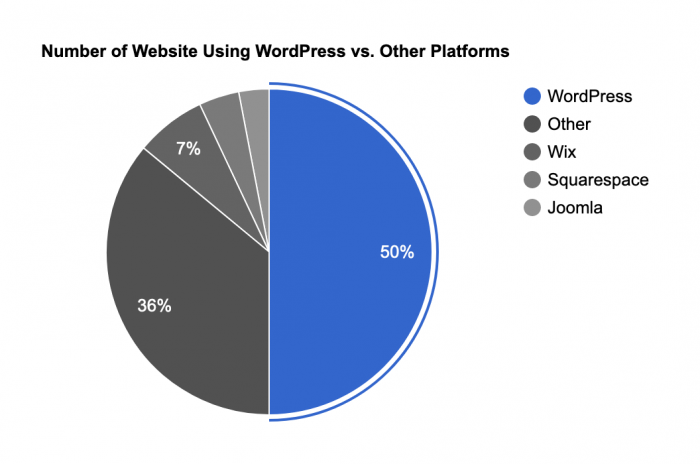
WordPress currently powers 52% of all websites according to data from BuiltWith. There’s a good reason why WordPress is the leading CMS of choice for websites and that number will only continue to grow.
WordPress is my preferred method of building websites for numerous reasons
- Free (OpenSource): Download and install on any web server
- Easy to install: Most hosting will include an easy install process
- Easy updates: Compared to other platforms like Joomla and Drupal, WordPress is a breeze to update
- CMS (Content Management System): Login to an admin system and make updates from anywhere is internet
- Support: Backed by a great team of developers and ever-growing community
- Tons of plugins: If you can dream it, most likely it’s already out there or could be built
- Tons of Themes: There’s a limitless amount of themes out there and it continues to grow
Are you convinced yet?
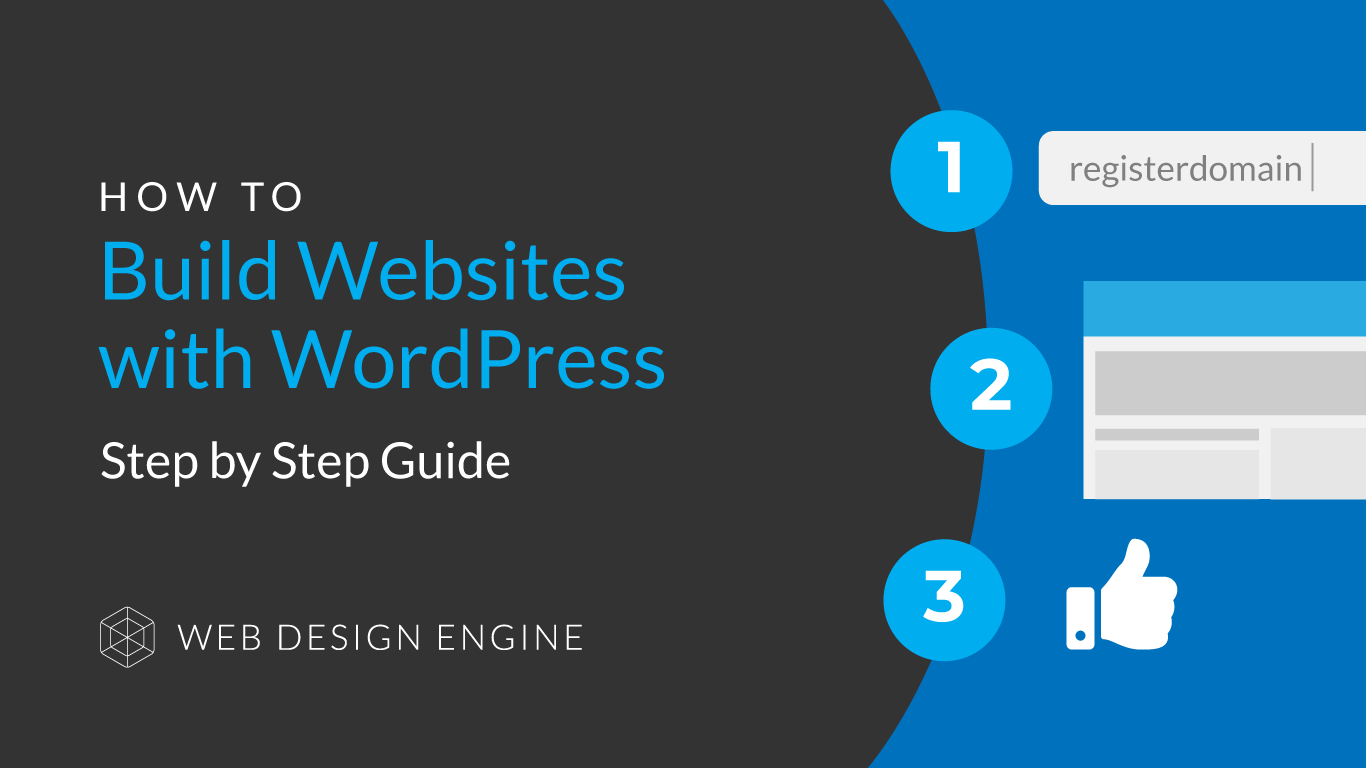
Let’s Build A WordPress Website
Now that we’ve gotten past all the reasons why you should use WordPress, let’s start creating our website.
Domain & Hosting
The first thing we’ll need to do is set up domain and hosting. Here are my top choices for website hosting.
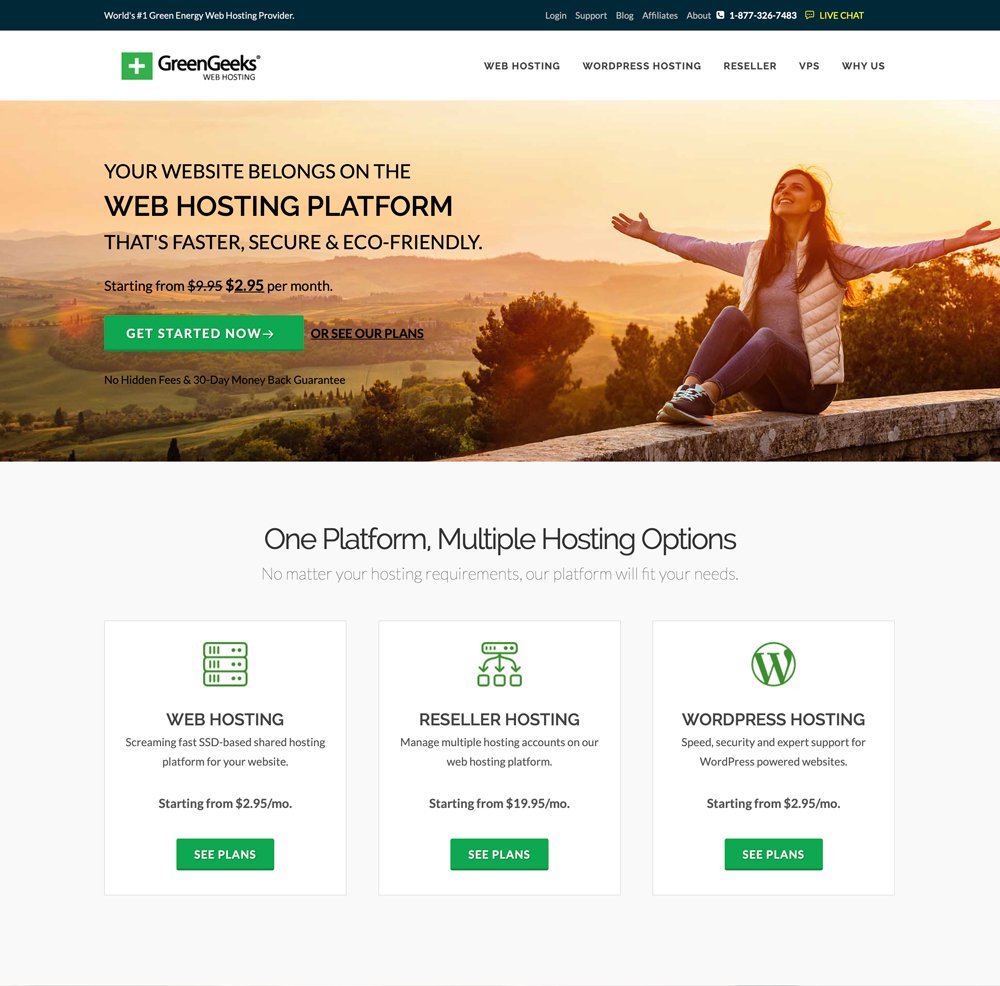
- GreenGeeks: Eco-friendly green hosting provider with plans starting at $2.95
- SiteGround: Consistently rated as one of the best hosting providers around with some of the best reviews for affordability as well as reliability and uptime.
- InMotion: A great value host with fast and reliable SSD (Solid State Drives) and often ranked as the top ten best web hosts. See my post on how to sign up for InMotion Hosting.
For the purpose of the rest of this tutorial, I will be using GreenGeeks as the hosting provider and WordPress set up. The signup process takes only about 1 minute to complete. After we complete the signup, we’ll be able to sign into the new account and install WordPress.
Step 1
First, go to the GreenGeeks website and click on the GET STARTED NOW button on their home page.
Step 2
Once you click on the GET STARTED NOW button, you will be presented with a page to either choose a new domain name (provided for free) or choose to use an existing domain.
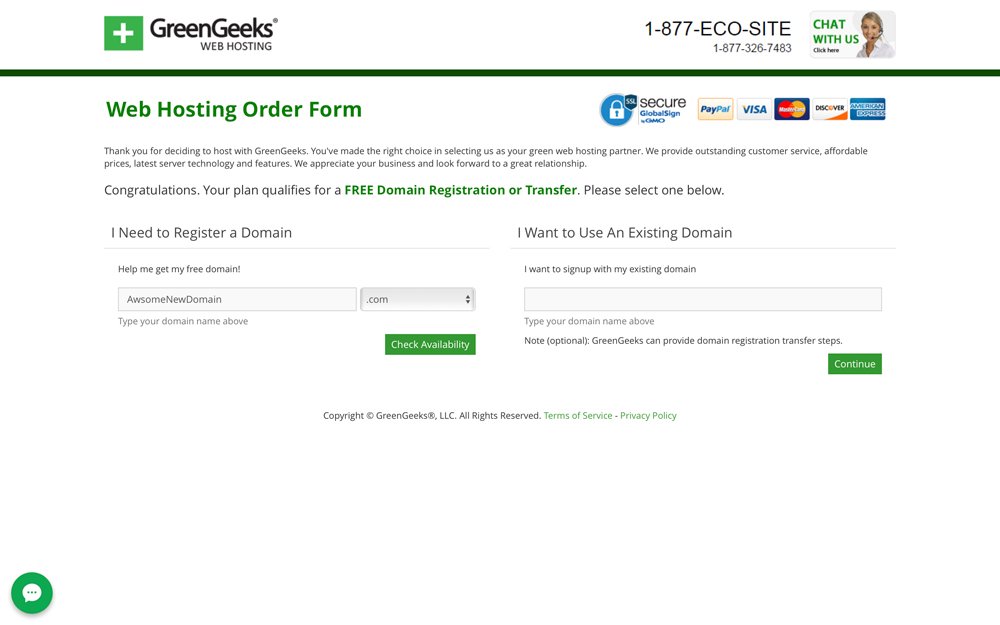
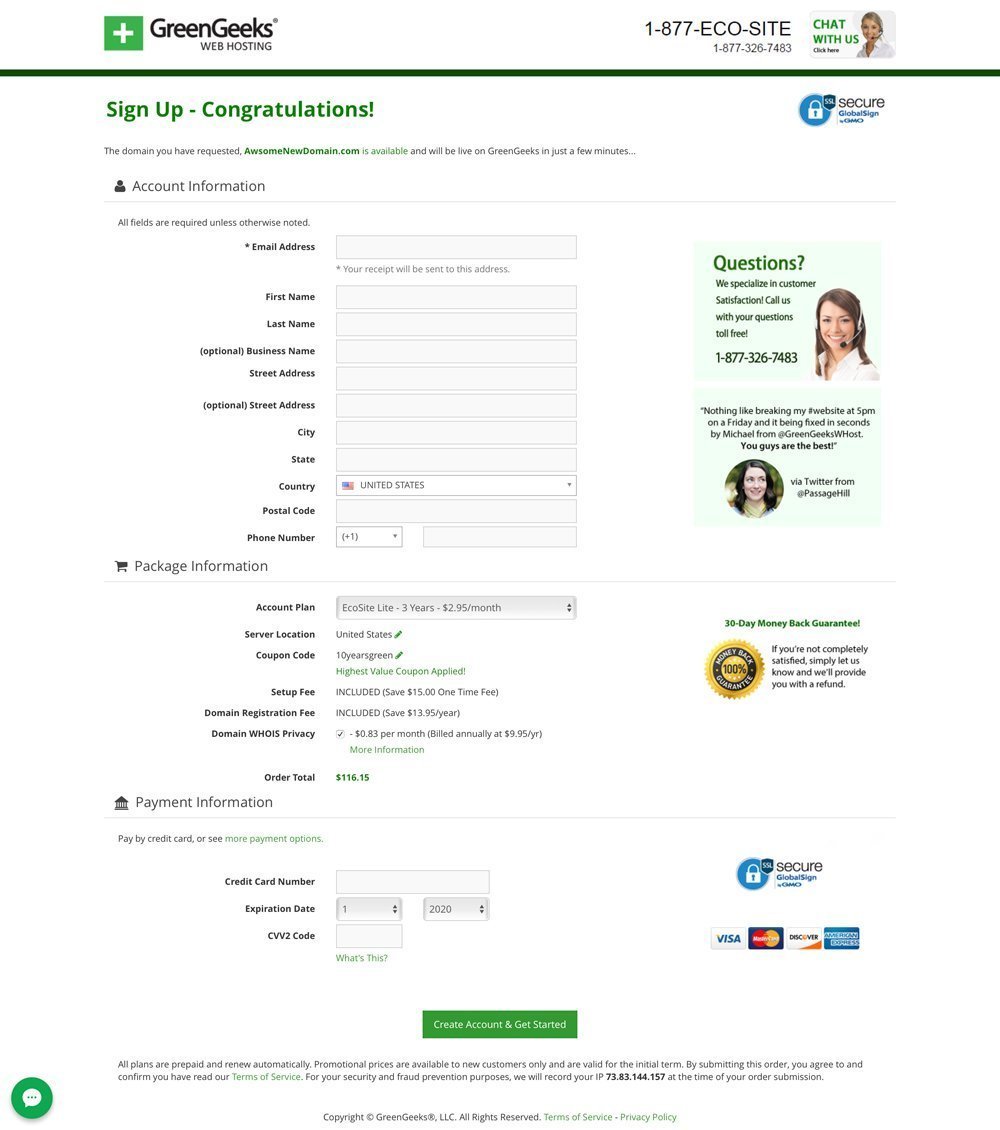
Step 3
GreenGeeks has a 1-page checkout that makes it super quick and easy to complete the signup process.
After you complete the checkout process, you’ll see a thank you page with an order complete message from GreenGeeks.
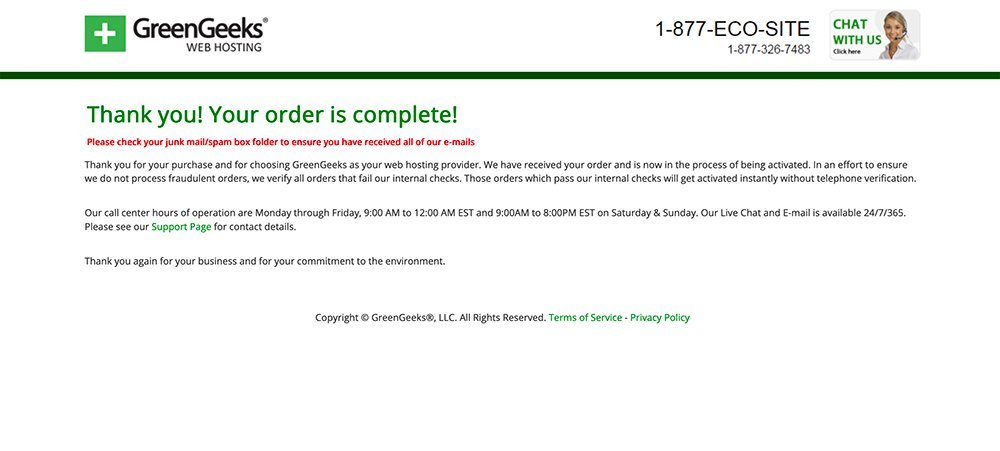
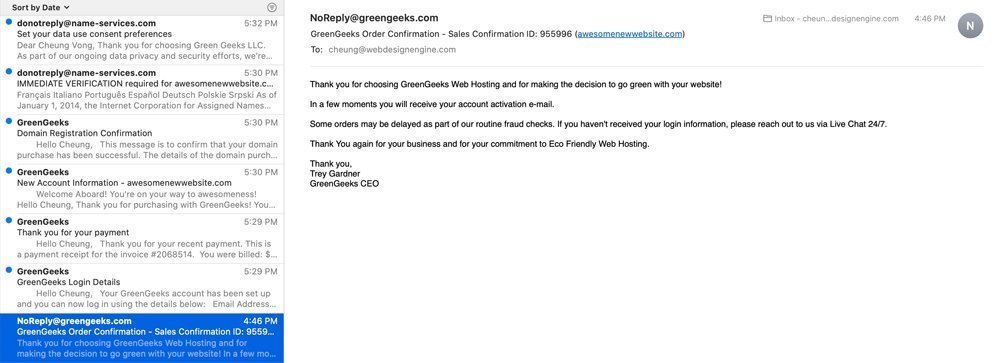
Check your email for your account login so you can access the hosting control panel to install your new WordPress website.
Install WordPress
Once you get all the emails and have access to your new GreenGeeks account, it’s time to install WordPress! Let’s go ahead and sign in to our new hosting account and access cPanel (hosting control panel).
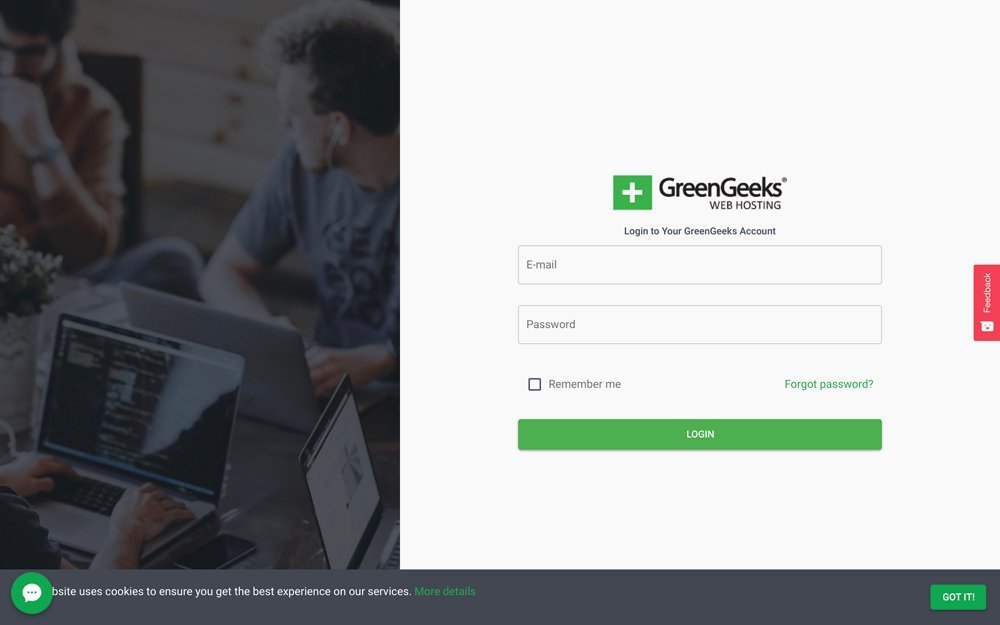
Step 1
Now, login to your GreenGeeks Hosting account at https://my.greengeeks.com/login with the credentials that were emailed to you.
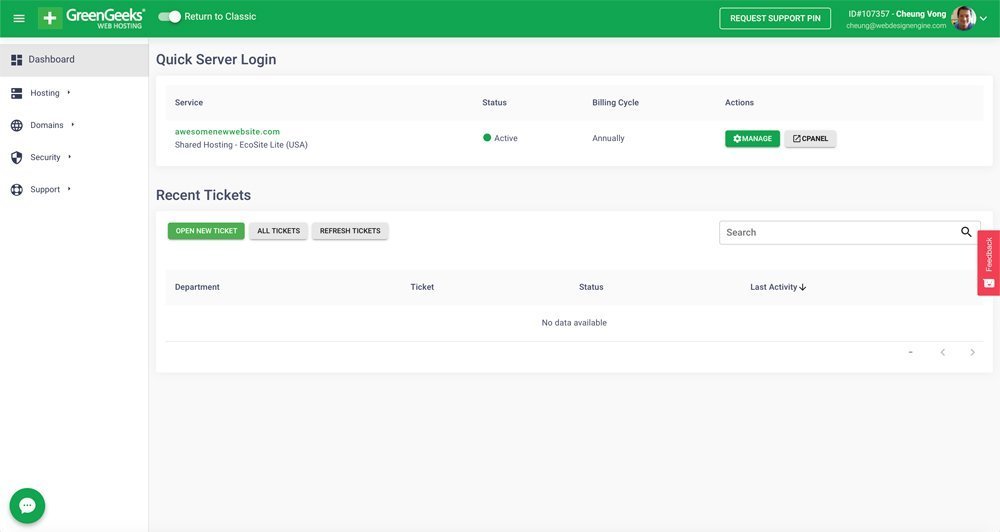
Step 2
Once you are logged in, you will see the GreenGeeks dashboard. Select the “CPanel” button in the Actions column to take you to the hosting control panel.
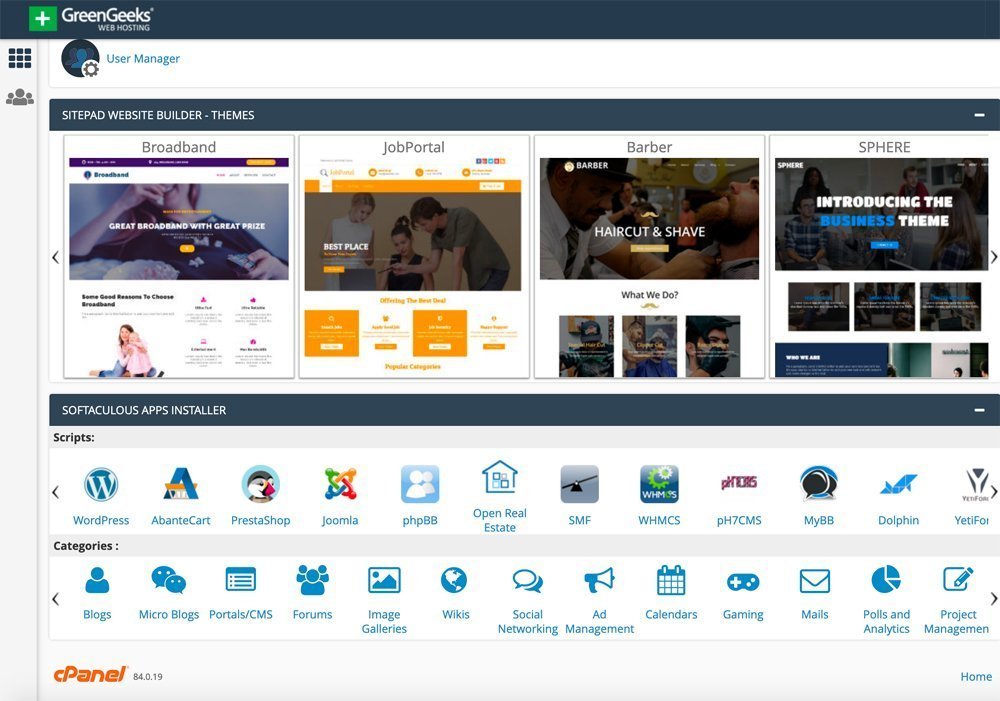
Step 3
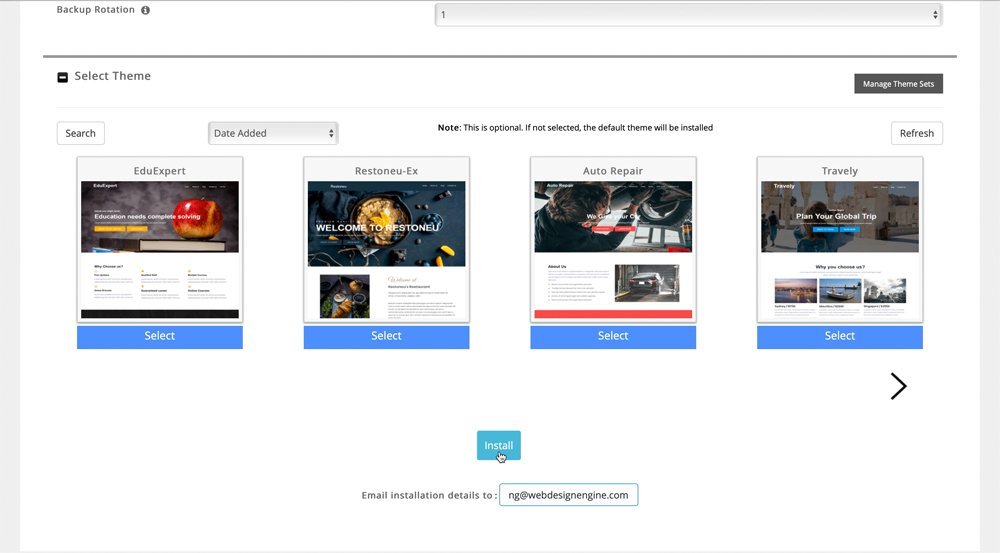
In cPanel, scroll down to the bottom and you’ll see some software scripts from “Softaculous Apps Installer.” Go ahead and click on the WordPress icon and follow the instructions to install WordPress.
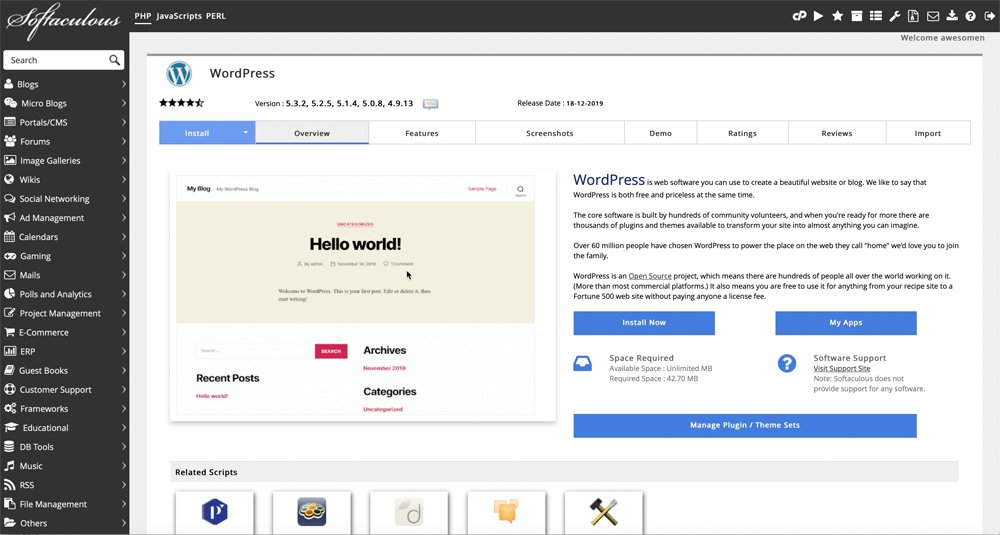
Step 4
Now, click on the “Install Now” button from the Softaculous Apps Installer to Install WordPress.
Step 5
Fill out all the info on the next page and click install. Be sure to change the username and password to something secure. I like to use the password generator so I know that the password is randomly generated but very secure.

Fill out all the required info to successfully install WordPress. Choose a secure username and password and keep it in a safe place.
Scroll to the bottom to start the install process.
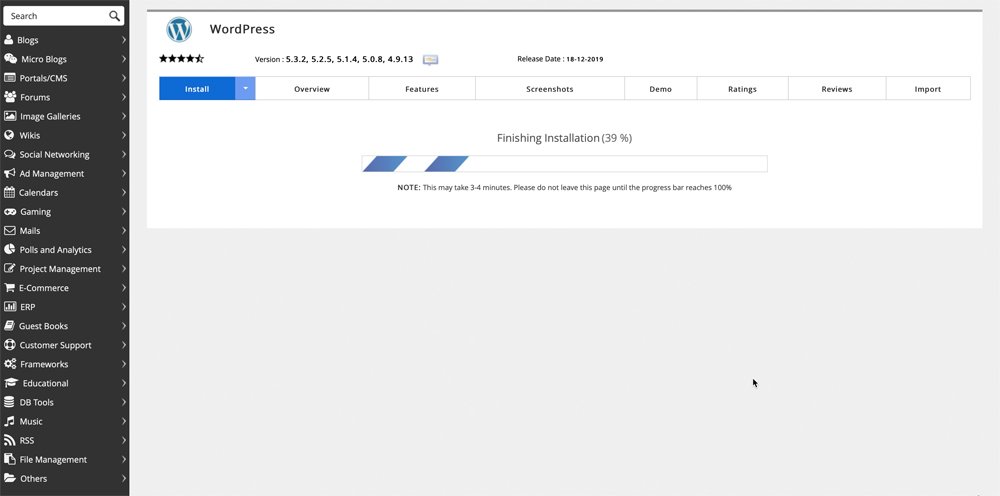
It only takes a few seconds to run the install.
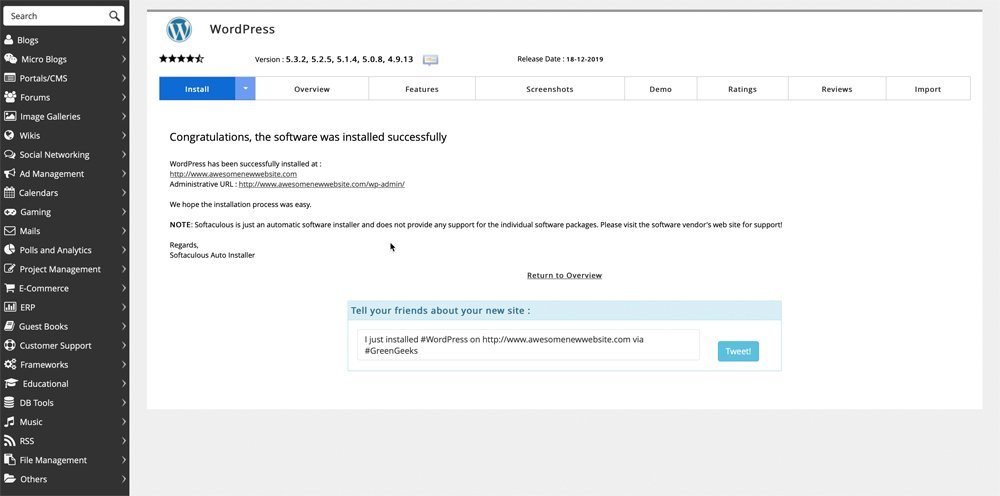
All finished! You just automatically installed WordPress. Now, take a look at the links at the top of your new WordPress install page. One of the links will take you to the home page of your new website and the other link will take you to your WordPress admin. The WordPress admin is where you manage your website pages, posts, images, and plugins.
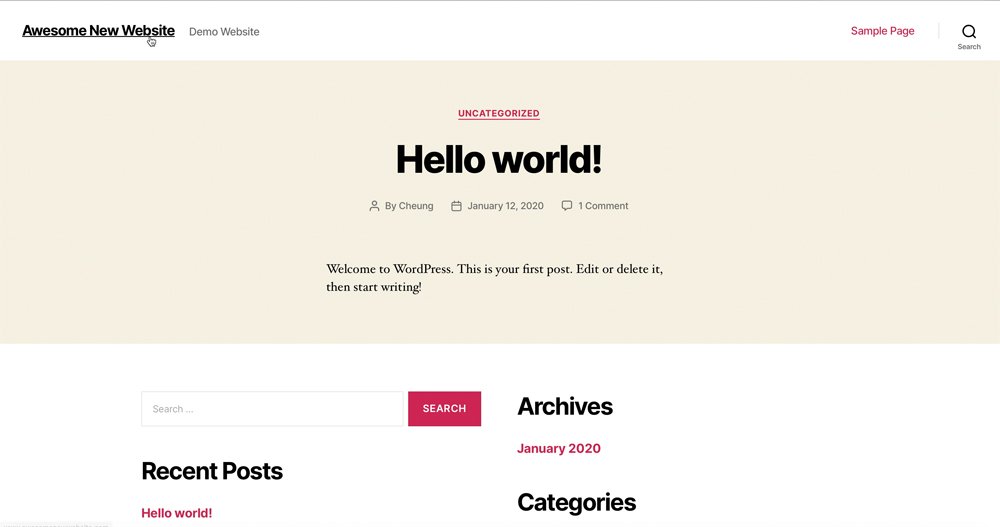
Here’s what the new WordPress website looks like. The default theme for the install is the Twenty Twenty theme. You can use this theme for your website because it takes advantage of the new WordPress block editor but I recommend purchasing a well-supported premium theme that can do a lot more.
Now that we’ve installed WordPress and have a basic website set up, we need to make it beautiful and unique.
I hope you found this tutorial helpful in setting up your website. Please comment below with any questions and join my Facebook group to find more help from the community. Thanks!